Sunday, December 18, 2011

Sew Happy Geek Table Runner/Wall Hanging Swap Completed!

Wall Hanging for partner

This is the wall hanging I made for my partner Shannon for the swap. She likes bright colors and there was a picture of a similar wall hanging from Purl Soho in her favorites so I decided to make it for her using solids.

Close up of quilting

Here is a close up of the swirly quilting I did.

Package ready to be shipped today!

Friday, December 9, 2011

Things I love...

Things I love

1. Earphone case, 2. Bear in the Birches, 3. Not available, 4. Not available, 5. Not available, 6. Not available, 7. Not available, 8. Not available, 9. My textile design

Created with fd's Flickr Toys

Wednesday, November 2, 2011

Tula Pink Nightshade!

Nightshade reveal...

So guess what happened last night at midnight?!?! Tula Pink gave us a sneak peek at her newest line Nightshade... Have a look here!!!

Monday, October 31, 2011

Neptune spotted...

Neptune Apron

I was at my local quilt store and look what I saw! A cute apron made of Neptune fabric by Tula Pink (Moda). Unfortunately they have been sold out of the precuts and bolts for at least 6 months. I wish I was able to get some!!!

Wednesday, October 26, 2011

Blue Quilt Updated

Blue Quilt Updated
I added a seven new blocks to the quilt that my sister sent to me. Now I'm just awaiting the last 5 to complete! So excited this is coming out so well!

Tuesday, October 25, 2011

A little fun

photo.JPG

I was having a little fun practicing machine quilting words... It's really a lot of fun, you should try!

Monday, October 24, 2011

Joel Dewberry

How can you NOT love this fabric?

Joel Dewberry

I think I want to use some of these prints in my upcoming Farmer's Wife QAL blocks... I'm pretty sure I won't be starting until after Christmas but I'm trying to plan :)

Sunday, October 23, 2011

Heather Ross love...

photo.JPG

Don't you absolutely adore Heather Ross prints? I just bought this cute print with little VWs on them. I wish I had discovered her years ago when more of these fabrics could be found... Still awaiting my fabric bundles from her recent studio sale!!! Can't wait!

Saturday, October 22, 2011

New fabric acquired...

Hushabye

If you know me, you know that I'm crazy about Tula Pink. I obsessively collect all of her fabric lines and always scouring new quilt shops for anything Tula. I just picked up a couple more pieces online and here is what I received... Some Hushabye and some Nest! I really REALLY wish I could find more Nest. It's my new favorite. Who am I kidding? They are all my favorite!

Nest

Friday, October 21, 2011

A busy day...

photo.JPG

I've been busy cutting! Much happier now that I changed my rotary blade!

Wednesday, October 19, 2011

A blue quilt

Blue Quilt

Here is the blue quilt I have been working on this month. It's a collaboration with some of my sister and relatives. A surprise gift for someone special! You can make this quilt using fat quarters and scraps... find out how here:

Tuesday, October 18, 2011

One costume down, one to go...

Front of robe

I finished my son's Halloween costume! This is the front of the robe and here is the back...

Back of robe

I messed up on the placement of the second half of the embroidery on the back but I decided not to frustrate myself too much and fix it. That may have indefinitely delayed this project.

Front of trunks

Front of the trunks... and the back...

Back of trunks

And now to finish Elmo for my little Marisol...

Monday, October 17, 2011

New Kindle Case Made

New Kindle case front

I made a new kindle case for my sister, suited to her taste. The main fabric used on the body is a print from Lily's Unafraid of Color Bundle from Sew Fresh Fabrics.

New Kindle case back

Sunday, October 16, 2011

Fabric as Art

Adding a little Tula

A few months ago I decided to decorate the walls of my children's room with some fabric covered canvas. I used command wall adhesives to hang the canvas frames and I think the result is really positive...

How I hung the canvas to the wall
Adding a little Saffron Craig

Saturday, October 15, 2011

New Tablecloth!

New tablecloth

I made a new table cloth this weekend, to replace the depressing blue one I had on before. It's a shame to even use a table cloth on this table since I really love it but a necessity since I have young children and they really like to destroy my furniture. I used home dec fabric I purchased from Ikea. I really love their prints, which I normally use for my shopping totes.

Friday, October 14, 2011

Scrappy Mug Rug Swap, Halloween Edition

Scrappy Mug Rug Swap Halloween Theme

Here is the mugrug I made for my secret partner. She requested a Halloween mug rug. I decided to try my hand at curved piecing. I wasn't entirely happy with the finished piecing block when I was done but I think the embroidered details really mask the parts I didn't like so much about it. I definitely need more practice at it but I think this was a suitable scale to experiment on. I used the tutorial at Lily's Quilts.

Some additional images...

Scrappy Mug Rug Swap Halloween Theme

Scrappy Mug Rug Swap Halloween Theme

Scrappy Mug Rug Swap Halloween Theme

Scrappy Mug Rug Swap Halloween Theme

Thursday, October 13, 2011

A quick gift

Tea Towels

I made this quick gift for my sister in law, Jill. We were invited for dinner so I thought I'd make a small hostess gift to go with the wine I was bringing. Adding a simple border to some ready made tea towels is a quick gift ready in about 30 minutes!

Wednesday, October 12, 2011

Neptune Quilt Top Finished

Neptune Quilt

I finally added the borders to my daughter Marisol's Neptune quilt. I struggled over what borders to add since the fabric I needed is no longer available on Etsy. I guess there is a real shortage of Neptune at any price!

Tuesday, October 11, 2011

Mosaic Inspiration

SewHappyGeek Table Runner/Wall Hanging Swap Mosaic

1. Tula Pink Nest, 2. Tula Pink, 3. modern Saffron Craig Block, 4. FQ Challenge - Pinwheel, 5. Sunday Stash #2, 6. parts-be-gone, 7. Mendocino + Neptune + Prince Charming, 8. dqs - pleats times two, 9. sneak 3, 10. { scrappy } hoops - sneeky peeky!, 11. Strips on Stripes 2011, 12. Parisville Quilt (sneak peek), 13. IMG_4548, 14. Fresh Modern Bee November, 15. Scrappy Pincushion Swap - Finished, 16. Modern Swappers Hint 1

This is my inspiration mosaic I posted for my partner for the SewHappyGeek table runner/wall hanging swap I joined. Come see the other mosaics at the flickr group! Or find out more about the swap on Jenna's blog.

Blocks for Amy

A Quilt for Amy

Here's a look at the block I made for Amy's Quilt. You can read more about this and the fundraising project for Amy here on Katy's blog.

A Quilt for Amy

Monday, October 10, 2011

Rubans pour le Cheveux

Here's a look at the quilt top I recently finished. It's a free pattern called Rubans pour le Cheveux from Free Spirit designed by Quilt Dad. I didn't use the solid colors recommended by the pattern, only using the lilac and cream color. I also didn't use the same patterns for each ribbon since I liked some prints more than the others. This was done using a labeling system that worked out quite nicely.

Rubans pour le Cheveux

Monday, August 22, 2011

Trying to find some inspiration

Playing with solids

Today I used some solids to make this block. It's not really for anything in particular but I wanted to flex my creativity and hopefully get back to creating things soon. I feel like I'm in a slump.

Last week I finished my patchwork squared quilt top...

Patchwork Squared Quilt top complete

I think it turned out quite well and I can't wait to quilt it and use some color to brighten it up.

Monday, August 15, 2011

Patchwork Squared Quilt top progress

PS2 quilt top progress

Here is my almost completed Patchwork Squared Quilt top. I started this a couple of months ago and am so excited to be sewing again after having my latest little one, Isla. I decided to make the center block out of scraps instead of completing the final block in the series. I feel like it makes it mine and once I add some borders, this little quilt will be ready for some stitching!

Friday, June 17, 2011

Mod Green Pod Baby Blanket finished!

Mod Green Pod Blanket

I finally finished this quilt up last night and am so pleased how it turned out. I bought the fat quarter stack of Mod Green Pod from a little quilt shop in Canmore, just an hour's drive from Calgary. The colors were so vibrant, I was immediately drawn to it. I didn't know what to pair this with to make it a little more boy, but the lady who helped me suggested using navy blue. I really couldn't see using navy but in the end I used her advice and it was perfect!

Mod Green Pod Blanket

I used warm n natural for the batting inside then machine quilted some loops and waves and did a little stitch in the ditch to quilt. As you can tell in some of the close ups, free motion quilting while two little ones are nearby doesn't help keep the lines free flowing and steady.

Mod Green Pod Blanket

A close up of my new labels from World Wide Label in Hong Kong. They sell on Etsy and the customer service is excellent! I received my labels less than two weeks to the day I pressed BUY on etsy!

Mod Green Pod Blanket

This is a gift for a friend's baby... now we just wait for the baby to come :) You can make your own quilt, the free pattern is from Sew Mama Sew's blog at: http://sewmamasew.com/blog2/2009/10/elizabeths-fabric-focus-charm-squares-baby-quilt/

Friday, June 3, 2011

Neptune Quilt Progress

Neptune Quilt top progress

So here is where my Neptune quilt is... I'm thinking of ordering some of Tula Pink's Prince Charming to complete a border. It's from the same color story and I'd really like to start sewing with some soon. Now which print to choose???

Scrappy Mug Rug Swap sent!

Mug Rug made for ruthiequilts

My partner ruthiequilts finally received her scrappy mug rug from me this week. She really loved the Wizard of Oz theme I followed. I haven't done much applique so this was definitely me going out of my comfort zone and trying to do something new. I am glad she loved the mug rug.

Mug Rug made for ruthiequilts

A little photo of the Tula Pink backing :)

Thursday, June 2, 2011

Amy Butler Weekender Bag!

Starting my Amy Butler Weekender Bag

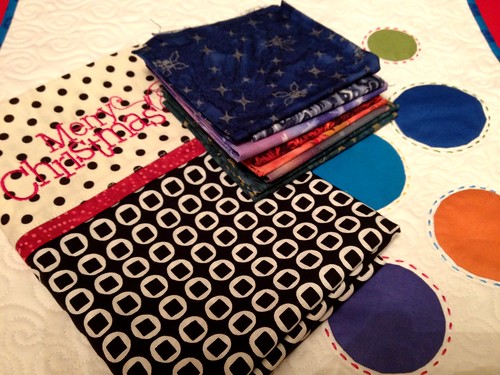
I had the pieces for this bag cut and prepared for months now... I've been reading any and all blogs about how to go about this since there are many horror stories out there about this bag. Okay maybe not horror stories, but a lot of frustration. So I've been talking myself out of it for a while now.

Until now.... I decided just to get going and try.

Basting on the piping

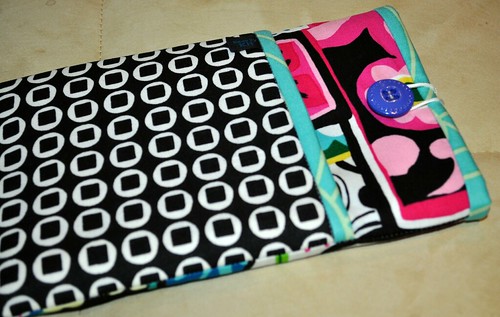
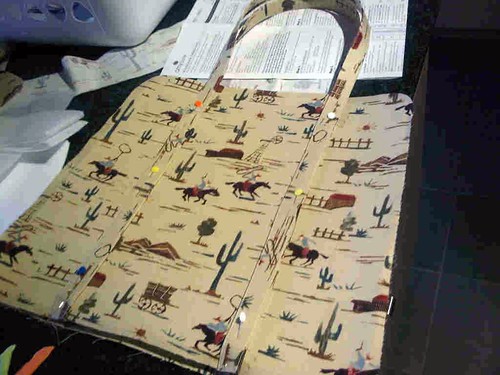
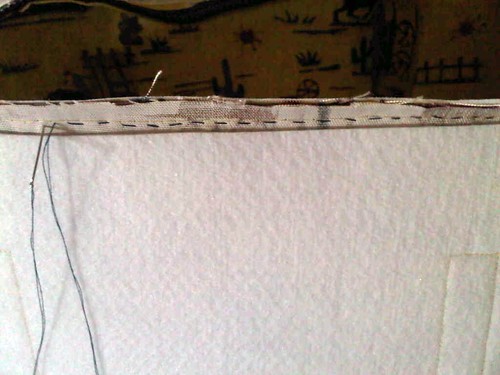
Instead of using basting tape to encase the cording, I simply basted it on while making sure it stayed flush with the edge, saving me a step :)

Main Panels finished

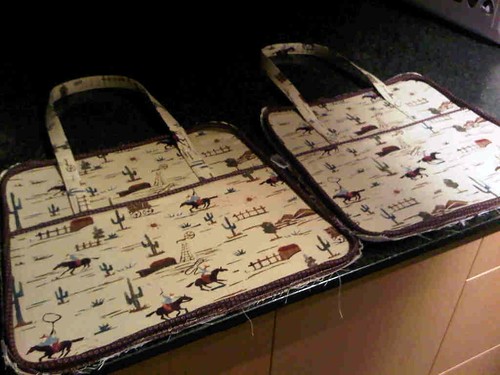
Here are the finished panels ready to attach to the bag. Next I sewed the zipper to the top panels, which wasn't a problem. I had read that it was quite difficult for some, but I've done many types of zippers over the years so I'm comfortable with them. Not a pro but not a problem.

Sewing the zipper panel to the main panels

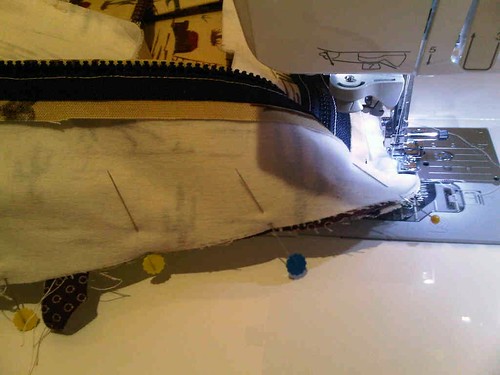
Next I machine basted the zipper panel to the main panels. This worked out okay for the first side but fitting the second side under was a bit awkward while trying to keep together. I ended up ditching all pins all together so I wouldn't poke myself.

On the next side I decided to hand baste.

Hand basting the main panel to zipper panel

I really liked this method and will use it the next time I make this bag. Far easier than manuvering the panels under the machine. To this point I broke 3 needles. I would say they were all because I was pulling at the fabric while stitching. Try to avoid that and just let the machine feed it.

Sewing the zipper panel to the main panels

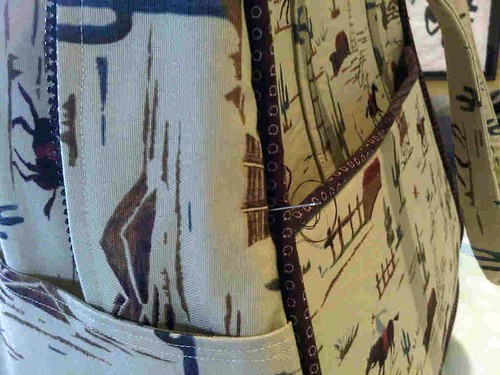
Sewing the main panels to the zipper panel was easier after basting and I just went slow. Often I would sew about 5 inches and check to make sure I was getting close enough to the cording, then start again. This is the longest part of the sewing process and you need to proceed slowly. I would suggest trimming your cording by 1/2" on each side on the outside pocket panels before sewing on the outside cording around the whole main panel. This reduces bulk in that portion of the seam.

Exterior of Bag finished!

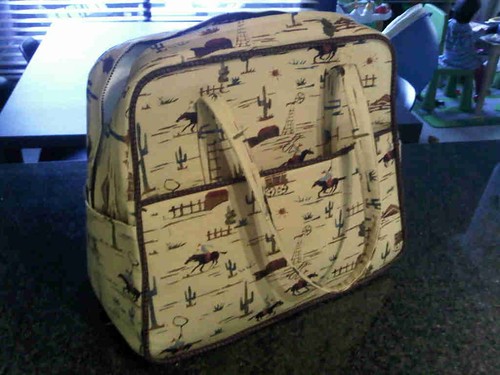
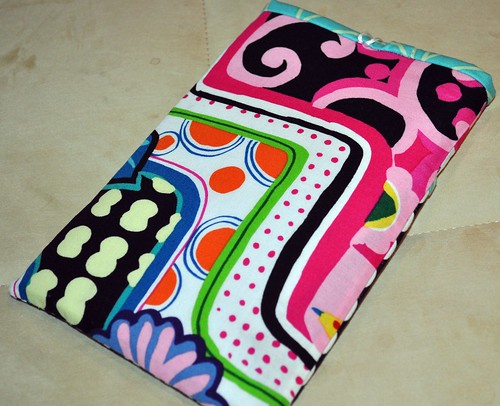
Yay! The exterior is finished!

Inside Lining w/pockets

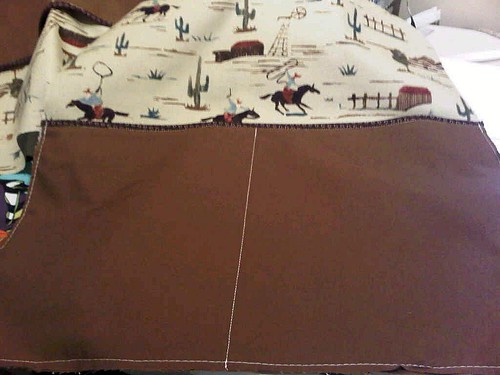
I added pockets to the inside lining panels. Lots of blog postings suggest this too. A great addition :)

Hand stitching the lining to the exterior of the bag

Now I'm just working on hand basting the lining to the exterior of the bag. I really love the way it looks and can't wait to start one in my "good" home dec prints! I will post a finished photo soon!

Visit Lynne at Lily's Quilts!

Fresh Sewing Day